
Please visit:
www.jennifersawickyphotography.com for wildlife, landscape and nature inspired artwork.
and
https://shopvida.com/collections/voices/jennifer-sawicky for textiles inspired by my photography.
Showcasing the beauty of Mother Nature
Please visit:
www.jennifersawickyphotography.com for wildlife, landscape and nature inspired artwork.
and
https://shopvida.com/collections/voices/jennifer-sawicky for textiles inspired by my photography.
Again this week I am replacing my “What I’ve seen this week” post with some photos from my time in Uganda. Basically, because all I have seen recently is snow… and not the nice to photograph, snow glistening from sunlit trees… the regular, driveway and road clogging, get out the snow blower and get on with the day kind of snow. Perhaps my desire for winter to end is a bit apparent!!! But anyways, on with today’s post.
During my time in Uganda, I took an afternoon boat trip along the Kazinga channel, where I saw more kingfishers in under 3 hours than I had seen in all my life before, combined. I’m not exaggerating to say there were hundreds of individuals there. There are nesting colonies along the river banks with dozens of birds at each site, and it just kept going and going.
Note, I meant to post this much earlier in the day, but I have been having nothing but issues with the WordPress “http error” when trying to upload images. My workaround was loading them to Google Drive, downloading to my mobile phone and uploading to media that way, but it certainly isn’t an efficient work around. Hopefully the “Happiness Engineers” will have some info as to how to resolve this issue.
Now, onto the pictures.

It was easy enough to get a photo of a pair of kingfishers as we cruised along, but the tree had probably 20+ birds in it.


Please visit:
www.jennifersawickyphotography.com for wildlife, landscape and nature inspired artwork.
and
https://shopvida.com/collections/voices/jennifer-sawicky for textiles inspired by my photography.


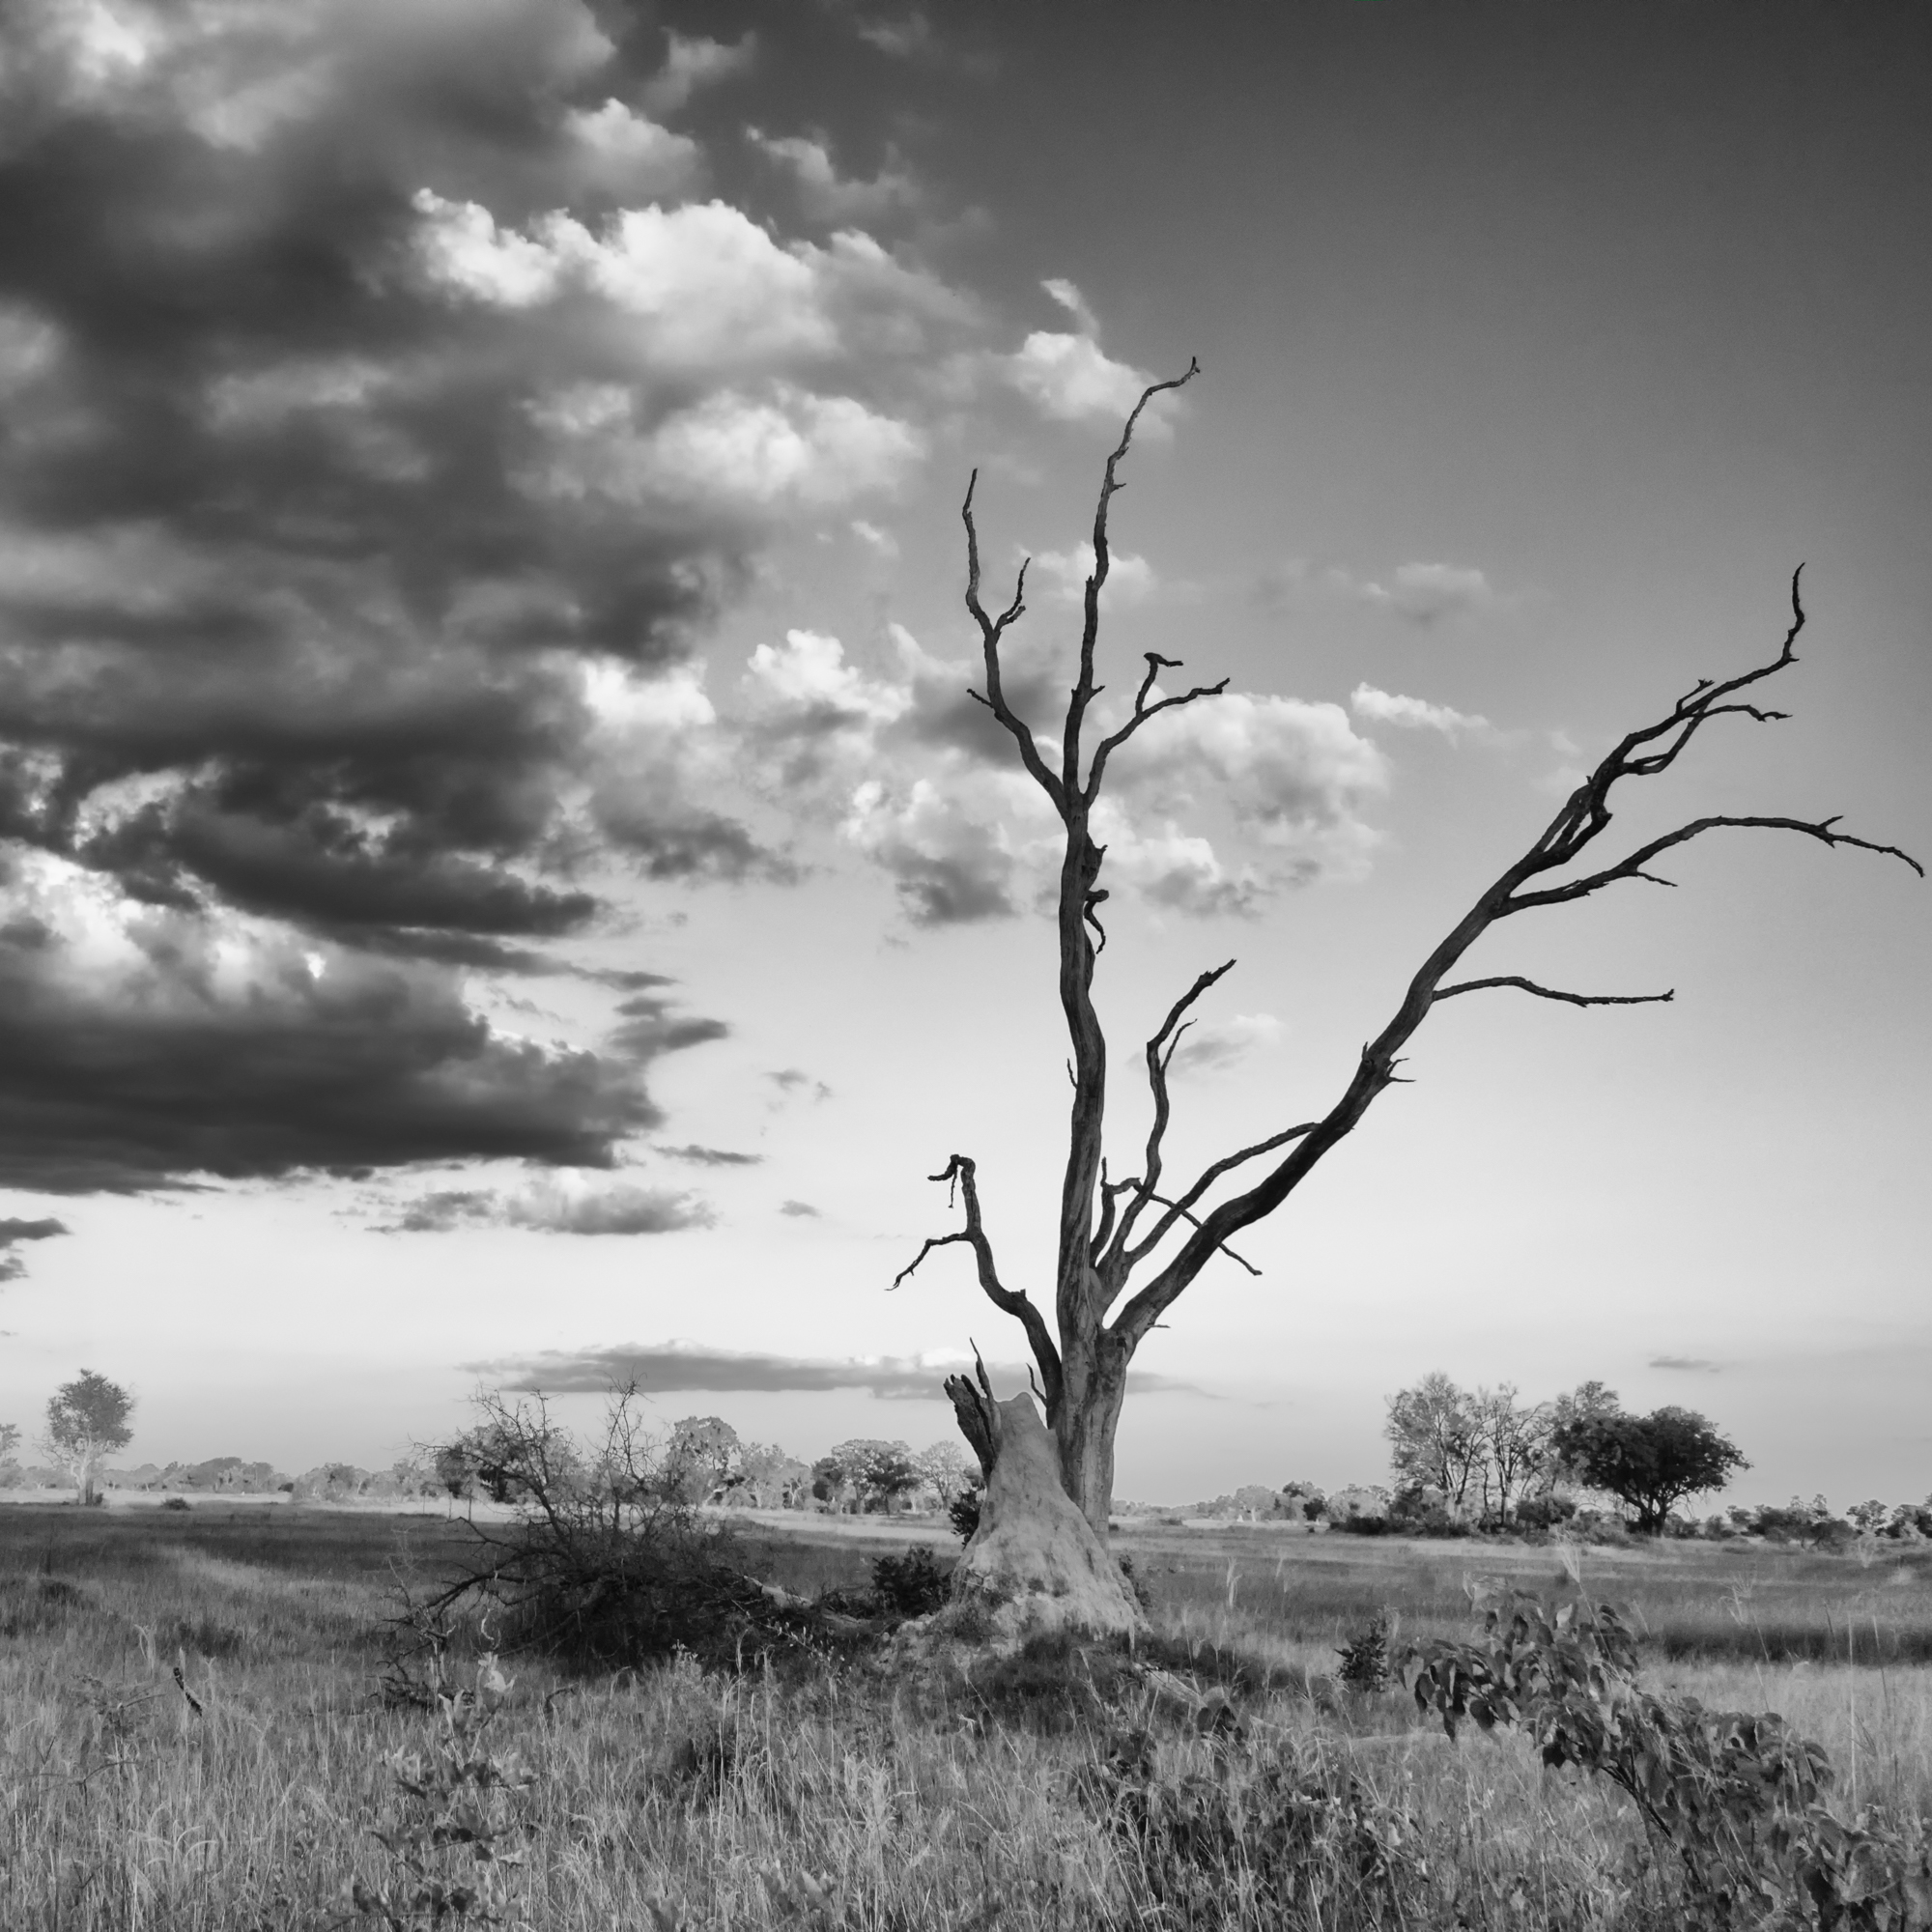
After a few posts dedicated to my time with the gorillas, I thought I’d better get back to a bit of variety. I hope you enjoy my choices for Monochrome Monday.
Have a great week everyone!


This is my final instalment in a 3 part blog series on Gorilla Trekking in Bwindi Impenetrable Forest. If you missed previous posts, you can find part 1 here, and part 2 here.

As I said in my earlier post, I had a GoPro on a headmount for the trek and my regular camera. I am definitely not a videographer, and looking back, I think having the GoPro on time-lapse mode may have been a better option than video during the trekking portion, as the video is very jerky from all the motion. I was, however, able to capture the silverback Makara on a mock charge when we arrived at the gorilla family on my first trek, and having that captured alone makes all the other crappy video worthwhile.

There is a good possibility that you will be photographing the gorillas through fairly thick vegetation at some point during your time with the family. Daylight is often very filtered, with combinations of heavy shade and some very bright spots of sunlight (if you get a nice day like I did). All of this combined can make shooting pretty tricky. I kept my camera on auto ISO and manually controlled the aperture and shutter speed. I believe I had my camera on spot metering, but I think matrix would have been a better option. On day one especially, with the juveniles so active, I kept my shutter speed fairly high and as such had a high ISO, usually 3200 or 6400 for most images. I also kept my camera on auto white balance, and it did a fairly good job of capturing colours that feel accurate while I am doing my post processing. In the group I was travelling with, only myself and one other person had SLR cameras, the balance were using either point and shoots or their phones. At some points I must admit I was a bit jealous with how lightweight their cameras were!


I mentioned before that I used a harness to help keep my camera from bouncing while trekking, and another consideration would be some plastic bags or dedicated rain cover for your camera in case the weather turns. Also, make sure you have a fairly large capacity memory card as you won’t want to be changing them while at your sighting, and make sure to start your trek with fully charged batteries. If you have a camera that is a battery hog, you might want to consider keep a spare battery in your pocket, as your backpack will be with the porters and trackers during your sighting.


Gorilla trekking was an amazing experience, and one that I would certainly consider doing again some day. While it may seem silly to some that I spent such a long time getting ready for the trip, I wanted to be prepared and make sure that I wasn’t wasting my time and money by showing up for an experience that I wasn’t fit enough to do. While I was lucky to have two fairly short treks, one group on the first day I was in Bwindi didn’t return to park headquarters until around 6 in the evening, and apparently had a very strenuous and steep climb to see their gorilla group. You never quite know what is going to happen when you are out in the bush, so best to be a prepared as possible.

If you have any questions or want some additional information, please feel free to leave a comment, or get in touch via the contact form on my About Me page and I will do my best to answer.
Please visit:
www.jennifersawickyphotography.com for wildlife, landscape and nature inspired artwork.
and
https://shopvida.com/collections/voices/jennifer-sawicky for textiles inspired by my photography.
Please visit:
www.jennifersawickyphotography.com for wildlife, landscape and nature inspired artwork.
and
https://shopvida.com/collections/voices/jennifer-sawicky for textiles inspired by my photography.
Hanging out with the buffalo is definitely a good match for the egret, but I am not so sure it is a two-way street. The buffalo’s movement and grazing causes insects to scatter, becoming easy prey for the egrets that walk alongside the herd of buffalo. Here the buffalo was wading in shallow water at the edge of the river, and the egret is just catching a ride.

Please visit:
www.jennifersawickyphotography.com for wildlife, landscape and nature inspired artwork.
and
https://shopvida.com/collections/voices/jennifer-sawicky for textiles inspired by my photography.
This is the 2nd part of a 3 part blog series on Gorilla Trekking in Bwindi Impenetrable Forest. If you missed part 1, you can find it here.
Trekking day:
I stayed at the beautiful Buhoma Lodge before and after my treks. On the morning of the trek, we had breakfast at the lodge, and then collected our pack lunches and water canteens and walked across the road to park headquarters to get assigned to our ranger and gorilla family. One thing to note, the lodge provided one water canteen, I would suggest taking at least double that if not a bit more. You don’t know how long you will be out, and you don’t want to end up dehydrated, especially if you are not used to a warm, humid, mountainous climate.

Park headquarters provided a welcome video and information briefing, assigned us to our groups and introduced us to our ranger. Some groups set out on foot directly from park headquarters, while ours had to drive to the setting off point. Our wonderful guide Jean-Paul from Wild Frontiers drove us to the setting off point and waited for our return; it was about 45 minutes drive through the hills to start. At park headquarters they will ask you if you want a porter for your trek (please answer yes to that!) and the porters will meet you at the setting off point.

Every article and post I read ahead of my trip recommended hiring a porter for your treks and I will do the same here. Even if you are very fit and can carry your pack easily, hire one anyway just for the economic benefit it provides the people of the region. The porters work incredibly hard; they not only carry packs but give you a hand to hold on to during tough up or downhill sections, even providing a push and pull if the terrain gets really steep. They are your extra set of eyes to warn of branches if you are looking down, or tripping hazards if you are looking up. They are fantastic at gauging what will be an effective pace for you and making sure that you stop often enough to catch your breath or take a water break. My porter offered to carry my camera for me as well, but since I wanted to take photos on route, I kept that with me. When there were interesting birds or monkeys, my porter was pointing those out to me as well.

For many of the men and women in the villages surrounding the park, being a porter is an excellent career and a way to provide a stable income for their families. There are always more porters available though than tourist spots, so they work on a rota system. My porter on the first trek, Emme, was not available to be my porter again on the second day, because he was at the back of the line having already worked that week. The daily salary for the porters was only $15 US, so I would suggest that anyone that can afford a $600 trekking permit can afford to help make one of the locals lives better by giving them some work for the day. I found all the rangers, trackers and porters that I dealt with to be friendly, helpful and very informative. Tipping is not mandatory of course, but it is greatly appreciated by all the crew.


For the porters, you pay and tip them directly at the end of the trek. For the rangers and trackers, their salary is paid by the park and included as part of your trek permit, and any tips for the team would be given to the head ranger to distribute amongst the group. It is also worth noting that the pack lunch provided by your lodge is likely to be enormous; there was no way that I could finish it all, and multiply that by all 8 tourists in the group, that is a lot of extra food. If you have extras that you would like to share with the rangers, trackers and porters, that is to also be given to the head ranger to share amongst their whole group.

There is a tracking team that goes out at first light to try to locate the gorilla families prior to the tourist groups setting out. While they may not find the families before the tourist groups set out, they will be able to find tracks and other clues as to the whereabouts. On my first trek, we set off on game trails through the forest, and walked for approximately 45-60 minutes prior to meeting up with the trackers to go to the sighting. On the second trek, we started out on the same game trail but quickly had to create our own, down the side of a steep hill through very thick jungle. The rangers were hacking a path for us with machetes, but it was difficult going and a very different experience to the fairly gentle up and down walk from the previous day. The bonus for the second day though was we found the family in a nice level area, making viewing an easy experience. On day one, we were perched on the side of a fairly steep slope trying to watch the group for a portion of the sighting.

When you get to the gorilla family, you have one hour to spend with them. The rangers will ensure that you stay safe during this time, that you don’t get too close to the gorillas and will lead you to different viewing places depending on the terrain and the movement of the gorilla families. On my first trek day, the juvenile gorillas were very active playing in the trees and roughhousing, but the adults were settled and relaxing. On the second trek, the reason we had to navigate such difficult terrain was the adults were not yet settled, and the trackers were concerned that they would be on the move again soon, and wanted us to hurry as much as possible to avoid missing them.

The rangers will provide information on the family during the sighting and answer questions that you have. One of the interesting bits of information my first ranger provided was the gorilla families are very aware of how much time the tourists are allowed to spend with them, and generally start getting bored and moving off very close to the hour mark of when the tourists arrive. I found this to be the case on both treks, though the second time, they began to wander at about the 45 minute mark, and we were allowed to follow a bit through the bush, which was an exciting experience. Once the hour is up, the trek back to the starting point begins. Depending on timing, you’ll probably stop for a pack lunch break. I was fortunate to trek on two dry days, so lunch breaks were the only time I needed my rain poncho; I used it for sitting on while having lunch.

Speaking of weather, mountain gorillas live in tropical rainforests, so rain is a definite consideration. While there is a chance of rain throughout the year, they do have a set rainy season as well. Definitely include the weather in your research on the best times to go on an adventure like this. I was in Bwindi the first week of September, and I believe that October is the start of the rainy season. It had been dry when I went for several days, so the trails were dry and I was lucky enough to trek under fairly clear skies. There are still a lot of fall hazards when it is dry though; leaf litter on the trails when going downhill can be very slippery, and trekking through thick jungle and being unable to see your footing can be hazardous. I did take a tumbled on the second trek, as we were heading downhill and I thought the ground was one place, but it was about a foot lower than expected. No damage done but I slid down a hill a good 20 feet or so on my butt, and actually took my porter down with me (sorry again!)
You can find part 3 of this post here.
Please visit:
www.jennifersawickyphotography.com for wildlife, landscape and nature inspired artwork.
and
https://shopvida.com/collections/voices/jennifer-sawicky for textiles inspired by my photography.

Please visit:
www.jennifersawickyphotography.com for wildlife, landscape and nature inspired artwork.
and
https://shopvida.com/collections/voices/jennifer-sawicky for textiles inspired by my photography.