

Showcasing the beauty of Mother Nature


I’m still doing my month of Topaz Studio editing, and decided on a different approach for the images today. I did the initial colour and tone correction in On1 Photo Raw, and then sent it over to Topaz Studio for further editing. I did that because the first image shown, of the leopard cub, was rendering so flat in Topaz Studio as a raw file that it would have taken a lot of work just to get it back to a place to start editing. I figured I would do the same for the other images, just to keep things consistent.
From a workflow perspective, it has definite advantages as the edited image appears back in On1 complete with all my keywords and other tagging that I use, so it is one less step to have to do to organize things.


Wishing everyone a great week ahead!
So far I have been concentrating on learning to effectively use Topaz Studio for standard editing, like I would do through On1 Photo Raw or Luminar. I still have a ways to go to figure out exactly how this would work into my regular workflow, but I decided to do a departure this week and play around with photo art instead. I watched a few tutorials during the week and one of them featured a new (to me) adjustment called AI Remix. The effects that the presenter was creating looked really interesting, so that’s where my focus has been this week, along with the more familiar to me adjustments through impression and simplify.
This first image was shot with my Panasonic camera whilst in Botswana, and it was after the sun went down so the image was incredibly dark and noisy; completely unusable as a regular photograph (just being 100% honest). But, I loved the posture of these two bull elephants jostling in the shallows of the Boteti River, and knew I could make something fun with the image, even if it wasn’t an something that I would traditionally mark as a keeper.

This next image is of a goliath heron. I wanted to simplify the details without losing all the texture and pattern of the feathers, and bring out colours and tones that reminded me of old film images. The result looks like a cross between a painting and a snapshot from an old point and shoot camera, but for me the image works. Perhaps because it brings back memories of the type of pictures I would see around cottage properties when I was younger.

This last image is bit hectic, but it fits with the subject, the amazing African Wild Dog. The combination of adjustments I used diffused the background significantly, but in doing so brought out repeating patterns of triangles in the vegetation which corresponds with the triangular shape of the dog’s ears. It almost feels like the dog rushed through a huge pile of fallen leaves and quickly laid down, while the leaves slowly drifted back down to the ground.

Creating painterly images or abstracts from photos isn’t everyone’s cup of tea, but it is something I enjoy playing around with once in a while. Topaz Studio definitely provides a lot of different options to use to create these types of images. Because I own the Topaz plug-in collection, I have access to a lot of these tools that aren’t available within the free portion of the software. The AI Remix adjustment is one that I currently have on trial, and it’s something I would need to experiment more with to figure out if it is a tool I’ll want to have available once the trial period is over.

I flagged this image as I was going to work on it over the weekend for my raw conversion comparison that I was doing, but 3 images repeated a few times seemed to be enough so I saved it for a monochrome treatment instead.
I’m glad I did! Doesn’t this guy look striking in back and white? He was so close to our vehicle, I had to crop out bits of the Land Rover that had made it into the frame.
Wishing everyone a fantastic week ahead.

I am continuing to enjoy working in Topaz Studio, and now that I am getting more comfortable with the interface, I am starting to notice some differences that may affect how I use the program for future images.
First off, I have noticed that there can be a dramatic difference in how Topaz renders the raw file prior to having any processing done, and it seems to be very dependant on which camera I was using. This lion image was shot with my old Nikon D610 (which I traded in late last year for a Fuji XT-2).


As you can see, with this image there are fairly dramatic differences in the colour rendering, the amount of contrast and detail in the image, and how bright the image is. The raw file appears to have a significant magenta cast in the Topaz file, compared to a more neutral tone in the On1 raw file. I have been finding colour correction a bit tricky with Topaz so far. I think of all the tools I have available to me, Luminar does the best job at correcting colour and especially removing colour casts.
But, even though I started from a different spot editing the raw file in Topaz than I would have from On1, I am happy with the results I was able to get with the image.

With this next image, the difference in colour rendering was far less between On1 and Topaz Studio, so as with all photo editing, images do need to be looked at on a case by case basis. The landscape image below was shot with my Panasonic FZ1000.


In contrast to the lion image, the raw file in Topaz Studio looks better to me than through On1, a little bit brighter and with a bit more detail.

Here is an image from this summer, shot with my Fuji XT-2. I sure miss sitting outside watching the hummingbirds zip around the yard.


The difference in rendering on the Fuji files is far less dramatic. The one out of Topaz looks flatter, but that’s what the editing process is for.
Here is the edited image:

After doing a few of these image comparisons, I am finding that there is a consistent, dramatic difference in the way On1 and Topaz render files from my old Nikon camera, with the files being significantly more “true to life” in the On1 rendering. Since I don’t have the Nikon anymore, this isn’t an issue that will plague me beyond finishing up the backlog of images I have that I would like to edit, so I can make smart choices about what software to use when. The differences between the raw rendering with files from my Panasonic or Fuji cameras is not so dramatic, and if I am using Topaz Studio, I have a better starting point with files from those cameras than I do with the Nikon files.


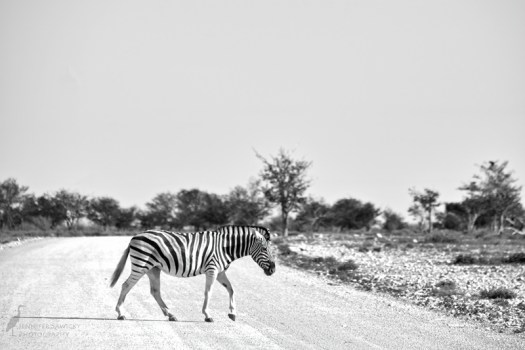
Just a quick single image post for Monochrome Monday this week.
A zebra stopping traffic on one of the roads through Etosha National Park in Namibia. The zebra were very abundant there, and quite chill around vehicles making for some nice opportunities for images. I’ve had lots of experience with zebra taking off in the other direction as soon as they realized you were looking at them.

Wishing everyone a fantastic week ahead.
As I mentioned in my August in Review post, I am going to spend the month of September diving into the Topaz Studio system. I had the full suite of Topaz plugins that I used to use with Photoshop, but the primary resources I used were the Impression and Remask plugins, and I never really spent the time learning the ins and outs of the others. I could utilize them, but I was never familiar enough to be sure which one I needed or to be able to use them to their full potential.
I spent some time this week watching a few tutorials to get a feel for properly using the Studio interface. I had found a few things were not intuitive for me, and watching the tutorials definitely helped. Studio comes with 10 free basic adjustments, and several of the Pro adjustments are included if you previously owned other Topaz products. They also have an option to try Pro adjustments for 30 days before you buy them, so I am going to trial a few additional adjustments that I have seen on the tutorials I have been watching. I have a feeling that may be a bit costly for me, as I have watched and now tried the AI Clear adjustment (which is pretty amazing), but we’ll see how things go once we get to the end of the month.
Below are links to tutorials I have watched so far. The Topaz Labs page on Youtube seems to have a lot of information and taped webinars, so I’m sure I’ll have more to share as the month goes on.
Topaz Studio can do a lot of things, including edit Raw files and save in multiple formats. But there isn’t an option for exporting and resizing for web, so while I am going to try and do all my adjustments through Topaz, I still have to take the files back into On1 to export at the proper size for uploading to the blog or to my Instagram page.
A few other differences to On1 Photo Raw and Luminar that I have noticed are the colour temperature under the basic adjustment is a simple temperature and tint slider, rather than having to opportunity to quickly try different colour temperature presets (daylight, shade etc).
I’ve not had a chance to edit as many photos as I would like this week, but I am impressed with the results of what I’ve had the chance to work on. I’m posting 3 before and after images for reference; if anyone is interest in the adjustments I used to create the final images, please let me know and I will post screen shots.
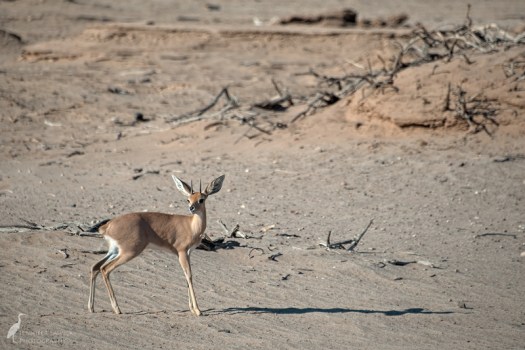
Here is a steenbok spotted near the Hoanib Camp in Namibia:


An oryx, also spotted near Hoanib Camp:


A springbok spotted while on a game drive in Etosha National Park:


The springbok image is the only one that I tried using some presets with. Topaz products such as clarity have the presets for the plugin available for the app. Using a preset, and then carrying on with other adjustments, was something that I had struggled with on my first pass with the program, but the key is to hit the apply button after working with one preset before moving on to the next. If there are any other Topaz Studio users that are struggling with that, I can post a couple of screen shots, but I found the answer while watching the Youtube presentation linked above featuring Hazel Meredith.
Well, that’s all for this week. I am hoping by next week to have had lots more options to put studio to the test and see what I can come up with.
Wishing everyone a fantastic week ahead.
